Friday, April 15, 2011

Rainbow Butterfly Cupcakes


It has taken two solid evenings of work, but they're finally done! Chocolate butterflies on rainbow cupcakes! Created specially for a special 4 year old on her birthday.

Directions for how to make the butterflies can be found at this blog: http://annies-eats.net/2009/05/26/butterfly-cupcakes/ I think that this is another recipe that will take a while to get right!

As for the cupcakes - just a simple vanilla cake, divided into six parts and coloured, then layered into the pattie cases. While they look good, I'm a little disappointed that I could not get the layers even, as I have seen some other people do - if anyone has any tips, please let me know!

I know it's not a cake, but...


It's rainbow jelly! I saw a photo by a friend and just had to try it. It takes a while but is well worth the effort.

A few tips:
- make the jelly a little stronger than you normally would.
- wait until each layer is fully set before you add the next layer. Even if it takes you two days!
- don't pour the jelly all in one spot - you'll end up with a hole in the layers beneath! Pour it around evenly, and not from too high up.

Next, I'm thinking about rainbow jelly trifle!

Thursday, April 14, 2011

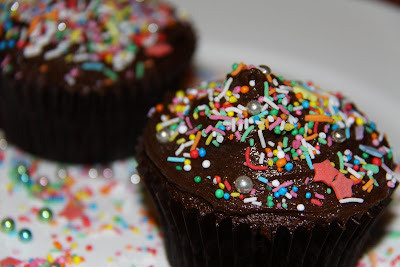
Because sometimes you just want chocolate and sprinkles...

Spider Cupcakes


Always popular with boys, and so easy to do! All you need is a basic chocolate cupcake, some thin licorice for legs and fangs, and lollies for the eyes (I used raspberries which were cut in half).

Can you come up with your own spider breeds? How about some red licorice or a dash of icing to make a redback? A cupcake and a mini cupcake to make a tarantula? Get creative!

International Women's Day


These miniature cupcakes worked well for an International Women's day function!

A post on how to make icing rosettes will be coming soon, if people are interested.

Pirate's Treasure Chest


This cake has got to be one of my favourites! So effective and yet quite easy to do. I made this one at the request of a 10 year old boy and he loved it. A similar design can be found in the book "Birthday Cakes for Kids" by Annie Rigg.

For this I used a loaf tin, the same one I use for banana bread. Once the cake is cooked, cafefully slice the top off - make sure it is a least 2cm thick or it will fall apart. This will be the lid of the chest.

Cover both the bottom and the lid in chocolate icing. If you drag a butter knife gently through the icing it gives it a wooden look.

Cut two pieces of card board slightly smaller than the top of the bottom half/bottom of the top half. Cover them in aluminium foil. Set one on the top of the bottom, and the other on the bottom of the top (confused yet?).

Now would be a good time to decorate the chest itself. I used sour straps and Smarties. Then you can add the treasure! Gold coins, CoolMints for pearls, anything you like. I used a needle and thread to make a jewelled necklace using Sugared Jellies - be creative!

Take care with the last part! Insert some toothpicks on the base, just behind the cardboard. Make sure that they are not sticking up too far, or they will stick through the lid and be visible! Gently place the lid on top, angled to rest open on the 'treasure'.

There you go! I dare you to try it - it's a fun one!